Slayin’ the 90s like Buffy

The 90s trend has been going strong since last year and the popularity of brown lipsticks, thanks to Kylie Jenner. I have been using brown lipsticks for ages, because I can never let the 90s go. Clinging on to youth for dear life. Personally, I thought that the trend would die. But it is now at its climax with not just 90s makeup trends making a comeback, but also 90s style clothing and fashion.

Screen Shot 2016-05-03 at 9.45.33 pm

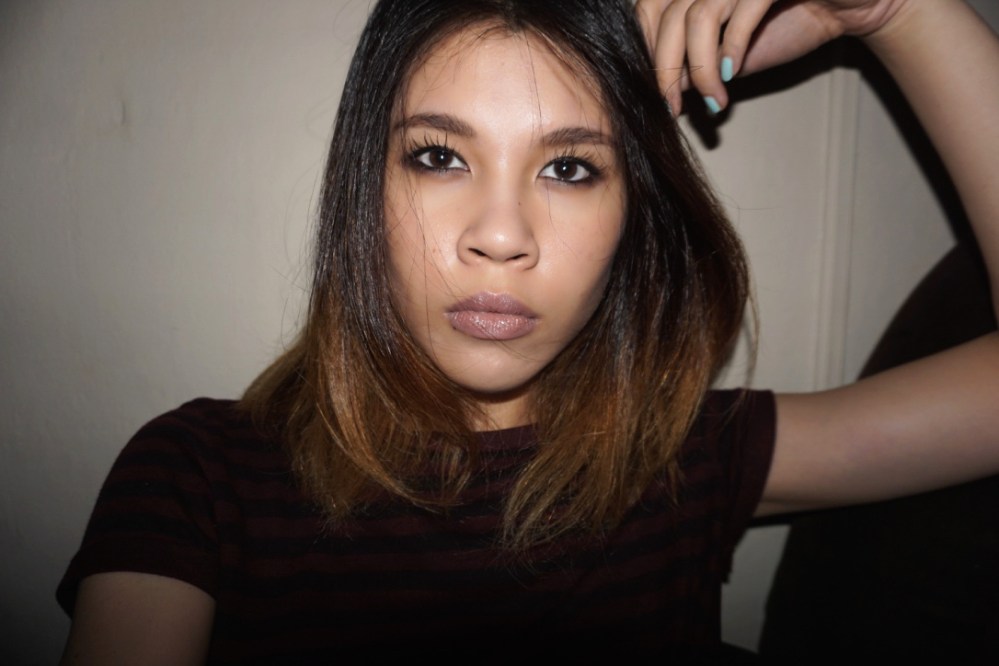
I’m all for that. I know that trends come and go but this one is one that refuses to go away. As with everyone else, I love the 90s makeup look. There are several that were popular within the decade. From super model bombshell looks like Cindy Crawford to grungy, undone looks by Winona Ryder, there are many routes you can take with this trend. Personally, I prefer the grungy look; A monochromatic brown smokey eye withbrown lips. Trust me, it looks a lot better than it sounds.


Let me walk you through it!

All the products I feature here are super affordable. Even though the trend is going strong in Sephora, you don’t have to break the bank to jump on this one.


thumb_DSC00962_1024 copy


Step 1 : Let’s start with the base. Matte skin is what it’s all about. The modern take on the 90s look incorporates extremely luminous skin. But I want to pay homage to the original. To prevent yourself from looking overdone or cakey, pair your favourite matte foundation with a moisturising primer. The L’oreal 24hr Infallible foundation (£8) is great for a high coverage, flawless finish. Underneath, I’ve used the Nivea Men After Shave Balm (S$9.95) in the ‘sensitive‘ version. Made famous by YouTube as the perfect drugstore primer thanks to glycerin as a main ingredient, which helps foundation stick to it and last all day.

Step 2 : Conceal any imperfections you want to conceal and prime the lids. I don’t focus too much on have an absolutely perfect canvas. I used the Maybelline Instant Age Rewind concealer (S$18.90) in ‘Light‘. I don’t bother concealing my dark circles too much or my pigmentation because this makeup embraces imperfection.

Step 3 : Do your brows as per usual! Brows in the 90s are either big and unkempt or thin and over plucked. I suggest defining your natural brow slightly and combing it through with a brow gel to great bushiness and that textured appearance. I used the Missha Perfect Brow Styler (S$8.90) in ‘Dark Brown’ and Milani Brow Gel (S$10).


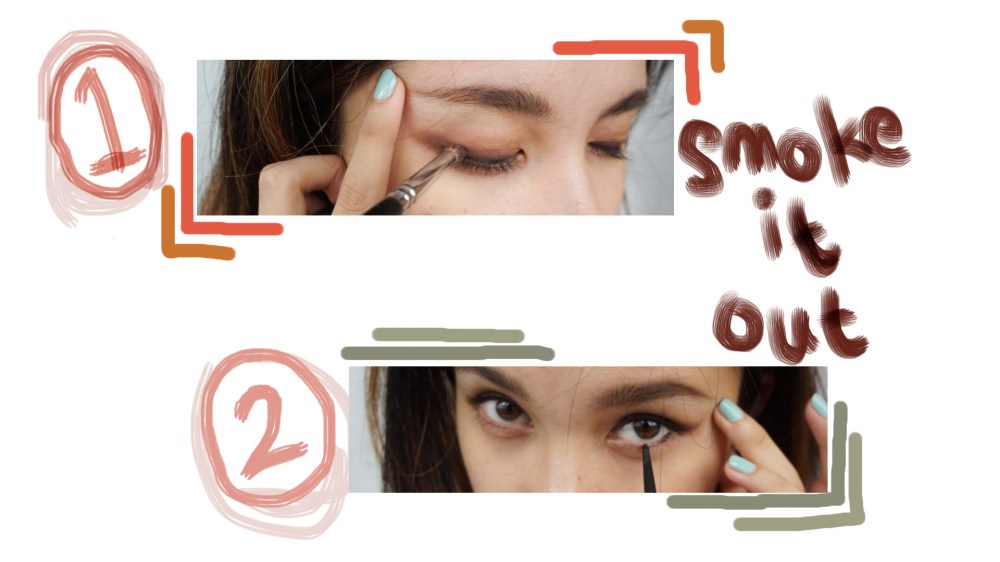
Step 4 : Let’s start with the colour! Red eyeshadow would be ideal, but it’s perfectly fine if you don’t have any. I’ve opted for a blush instead. This bright red blush is the CATRICE Defining Blush (S$6.90) in ‘I’m a Survivor‘ from a limited edition collection. But any bright red blush will do. Pack it on the mobile lid and all the way to the crease. Start with a light hand and build the colour slowly. Bring the colour with the same brush underneath the waterline, messily.


thumb_DSC00990_1024 copydefinethumb_DSC01004_1024 copyline

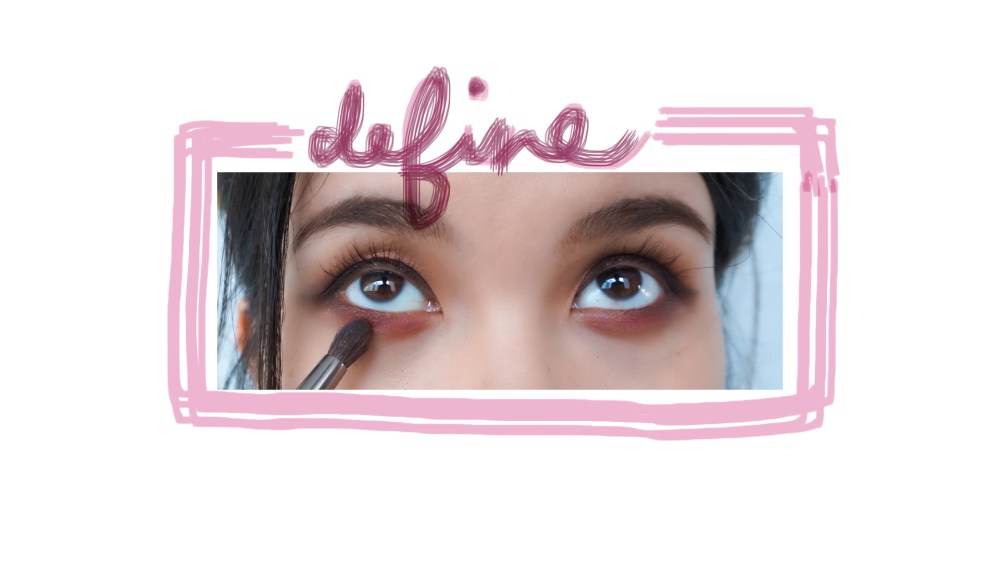
Step 5 : Grab a rusty brown shade. I chose a satin reddish brown colour from Moonshot in ‘Russet‘ (S$16) and a fluffy crease brush. Blend the edges of the red with the brown into the crease, putting the most product on the outer V of the eye. Blend the same colour under the eye with the same brush. Don’t be afraid to bring the colour lower than you are used to. If you are starting to look like a red-eyed panda, you are doing it right!

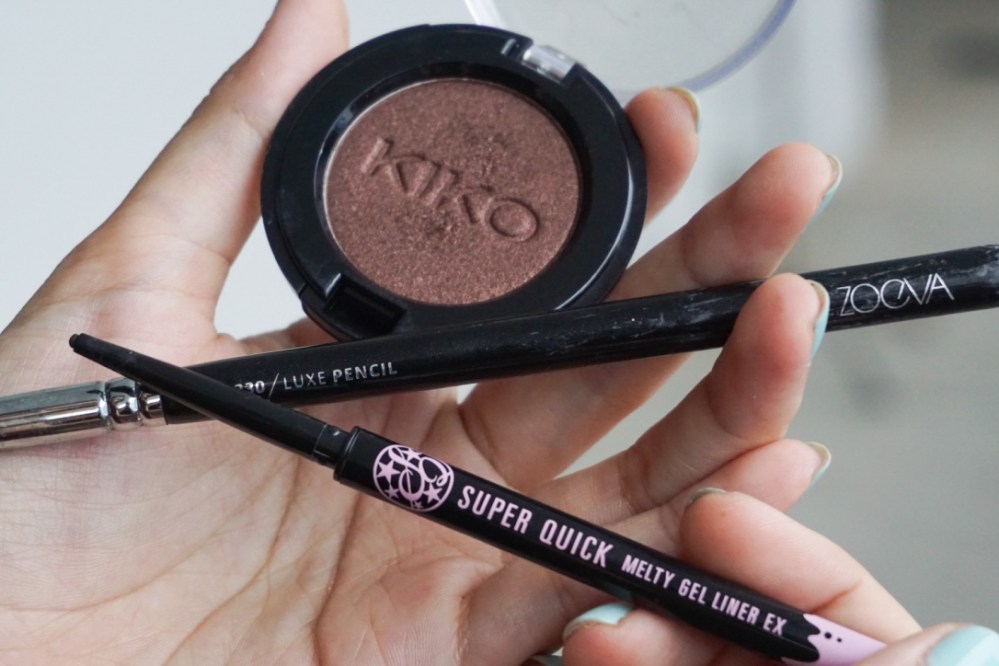
Step 6 : Line your upper lash line with a dark brown or a purplish kohl liner. Here, I used the KIKO eyeliner (£5.90) in ‘Dark Tide‘. Before it sets, use a pencil brush and dip it in a deep burgundy eyeshadow. This is from the Wet n WildComfort Zone‘ eye palette in ‘Definer‘. Smudge the line out with this colour and go on the waterline as well to smoke it out. The darker the better!


thumb_DSC01019_1024 copy


Step 7 : Mascara. LOAD IT UP!! Go crazy. Top and bottom lashes. Use a jet black formula that is very volumizing like this Sephora Lash Plumper (S$22) in ‘Ultra Black‘.


Step 8 : Finish up the face by adding definition with bronzer and colour with blush. I used the CATRICE Sun Glow Matt Bronzer (S$6.90) in ‘Deep Bronze‘ at the hollows of my cheeks to enhance the bonze structure. This, I feel is crucial to the look as it really adds dimension. Then I topped the cheeks off with KIKO Soft Touch Blush (US$3.90) in ‘Mauve‘, a perfect muted colour that matches the eyes perfectly. Make sure to do a light dusting as cheek products were not a big focus in 90s makeup. You can even skip this step, if you’re in a pinch.


thumb_DSC01048_1024 copy


thumb_DSC01046_1024


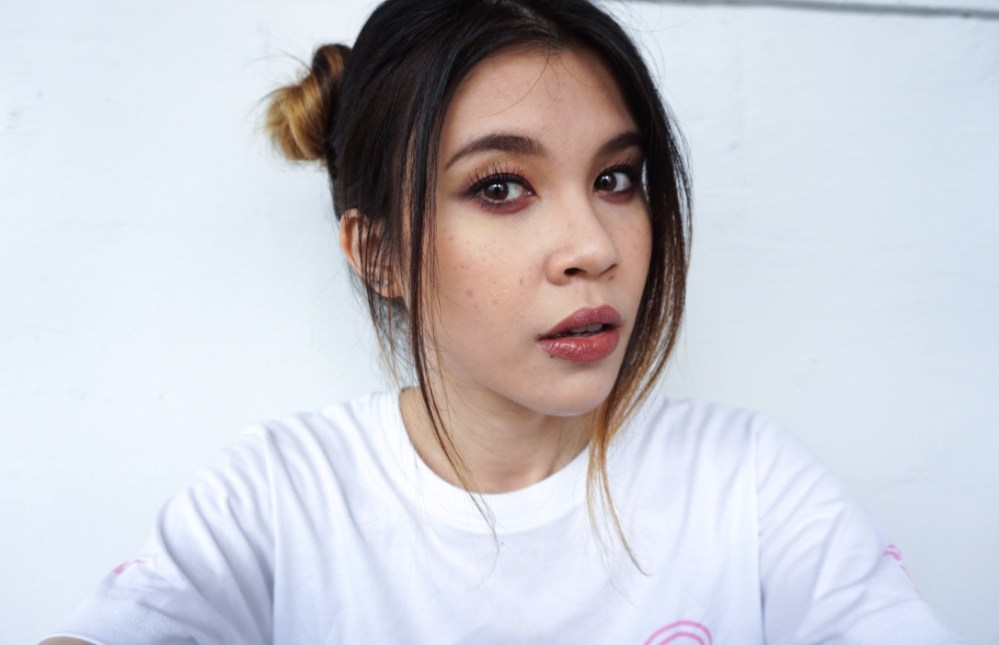
Step 9 : Last but certainly not least, complete the look with the perfect brown lipstick. Pick a shade that goes well with your skin colour. I picked shades that have reddish undertones within the brown so that it keeps my face from being washed out. For a creamier formula that is moisturising and perfect for everyday, I have Maybelline Color Sensational lipstick (S$21.90) in ‘Crazy for Coffee‘. For that super 90s feel, opt for a matte formula with the NYX Liquid Suede Lip Cream (S$15) in ‘Soft-spoken‘. A stunning mauve shade that is slightly cool toned, but incredibly flattering. This is supposedly the cheaper dupe of Kat Von D’s ‘Lolita‘.

Throw on a choker and BOOM! It’s as if you time travelled.


Screen Shot 2016-03-15 at 12.09.01 am

thumb_DSC01049_1024


thumb_DSC01059_1024


thumb_DSC01072_1024


I’ve been using this look on almost a daily basis, even with regular clothing, that might not be in the 90s style. The grunge look is very versatile, bold and feminine at the time. It’s incredibly easy to execute too.

Try it for yourself and let me know how it turned out for you. Hop on the bandwagon, y’all!

Smokin’ in Spring

Spring has sprung and it’s all about dewy, luminous skin. It’s hard not to think about light pastel shades and a flush of pink when we think about Spring. Not to mention, the highlight trend that is not dying down. Everyone is practically bathing themselves in glitter. Slowly but surely, we are all becoming part of Edward Cullen’s crew, sparkling in broad daylight, glowing even at night. And there is absolutely nothing wrong with that!

But the thing about living in Singapore is that, it’s constantly Summer.

Constantly one season all throughout the year. So I never thought it made much sense for us to be following the trends set by fashion designers and influential makeup artists. Even more so for us, we should make our own trends. Disregarding whatever “season” it technically is for the rest of the world.

So I say, SMOKEY EYES in Spring! Why the hell not!

Smokey eyes are a classic. It brings attention to the eyes and it’s perfect for a night out. Yet it’s still daytime appropriate depending on how dark you make it. It screams sexy sophistication. While I do enjoy the precise quality of Kim Kardashian’s famous smokey eye, the smokey eye I tend to go for is a more relaxed one. It’s meant to be messy, perfect for beginners. I have always felt the messier the application, the edgier the result.


This is my Two Step Smokey eye! Sexy and Sultry in two minutes flat.

thumb_DSC00452_1024


You will need two things for this look; A dark brown eyeshadow and a black eyeliner. Depending on the look you are going for and the undertone of your skin, you can opt for a warmer or cooler brown shade. It doesn’t matter if you choose a matte formula or a shimmer. What matters is that the eyeshadow has high pigment and a very blendable formula. I have chosen my KIKO eyeshadow in #132 (€6), a dark shimmery brown colour with a reddish undertone. These eyeshadows are super affordable and pack a punch.

For your liner, opt for a creamy formula that is easy to smudge and play around. Kohl liners are the obvious choice as they are made for smokey eyes. However, if you are looking for a longer lasting formula, or if you have oily lids like me, you might want to opt for a waterproof gel formula in pencil form. I went for the SANA Super Quick Melty Gel Liner EX  (S$19) in black. An amazing formula from this Japanese drugstore brand that is jet black and comes in an ultra fine nib. Very similar to the Hourglass 1.5mm mechanical gel liner (US$45) that everyone raves about. This is a fifth of the price and lasts all day in the waterline.

Other tools you will need are a pencil brush and mascara. I feel that a pencil brush is absolutely necessary for this look as it will help you achieve that smokey effect, without any effort at all. I recommend the ZOEVA 230 Luxe Pencil Brush (S$14.50).


smokey

smokey 2


Step 1 : Apply the dark brown eyeshadow very close to your lash line and use the pencil brush to diffuse the colour. You should have a halo of dark brown rimming your eye.


Step 2 : Line your upper lash line with the black eyeliner. Opt for a thin line as it will be easier to blend and diffuse the colour later on. Use the same eyeshadow and pencil brush to smudge over the black eye liner before it sets. Do the same for the lower lash line. Line with black liner and then smudge using the brown eyeshadow.

**The reason why we use the brown shadow rather than just smudging out the liner by itself, is so that we can achieve that gradient effect where the darkest concentration of colour will be at the lash line and then it diffuses out. The brown shadow cuts down blending time and makes it seamless.


Step 3 : Load up the mascara!! Use your blackest, most volumizing formula and pile it on both your top and bottom lashes. False lashes are also an option, if you want to add more drama and glam to the look. There is no need to be precise with the mascara application and don’t be afraid of clumps because it just adds to the grunge effect.


Step 4 : Line your upper and lower waterline, making sure that everything is covered with black liner. You should not see any spot of ‘skin colour’ around your eyeball. The darker the liner, the better.


Screen Shot 2016-03-15 at 12.09.01 am

thumb_DSC00399_1024


And there you have it! The simplest smokey eye that anyone can achieve, even with affordable products like I have. How dark and dramatic you go is entirely up to you!  You can add more brown eyeshadow and smudge the liner lower to add more drama. You can also play with the intensity of the gradient by repeating the steps so that there is more pigment around the eye. Pair it with a sexy nude lip, no blush and a contoured face so that there is little distracting from the eyes.

I love this look!!

It’s dark, mysterious and it gives me a boost of confidence. I feel so badass, without feeling over the top. This technique isn’t revolutionary nor unique. However, that’s precisely why it’s such a go-to look and something ANYONE can achieve.

It’s the makeup equivalent of “smoking” your exams. No skills necessary!

So smoke away!!

thumb_DSC00458_1024